Spring Boot와 MySQL을 활용한 iOS 게시판 앱 개발 - 기초 개념 정리 🚀
Spring Boot와 MySQL을 활용하여 iOS 앱의 백엔드를 구축하는 방법을 정리해보겠습니다.
특히 Kotlin과 최신 Spring Boot 버전을 사용하여 REST API를 설계하고, SwiftUI 기반의 iOS 앱과 연동하는 기본 개념을 다룹니다.
📌 Spring Boot와 MySQL을 활용한 iOS 앱 백엔드 구축 이유
Spring Boot는 빠르고 간편한 백엔드 개발을 지원하는 강력한 프레임워크입니다.
MySQL은 확장성이 뛰어나고 안정적인 관계형 데이터베이스로, 게시판 앱과 같은 CRUD 중심 애플리케이션에 적합합니다.
✅ Spring Boot(Kotlin)의 장점
- 자바보다 간결한 Kotlin 언어 지원
- 빠른 실행 속도와 자동화된 설정
- REST API 개발을 위한 강력한 기능 제공
✅ iOS 앱 개발과의 연계
- SwiftUI와 REST API 연동이 용이
- JSON 데이터 포맷을 활용한 클라이언트-서버 통신
- JWT, OAuth 등을 활용한 인증 시스템 구축 가능
이제 본격적으로 개발 환경을 설정해 보겠습니다! 🔥
⚙️ 개발 환경 설정
🔹 필수 도구 설치
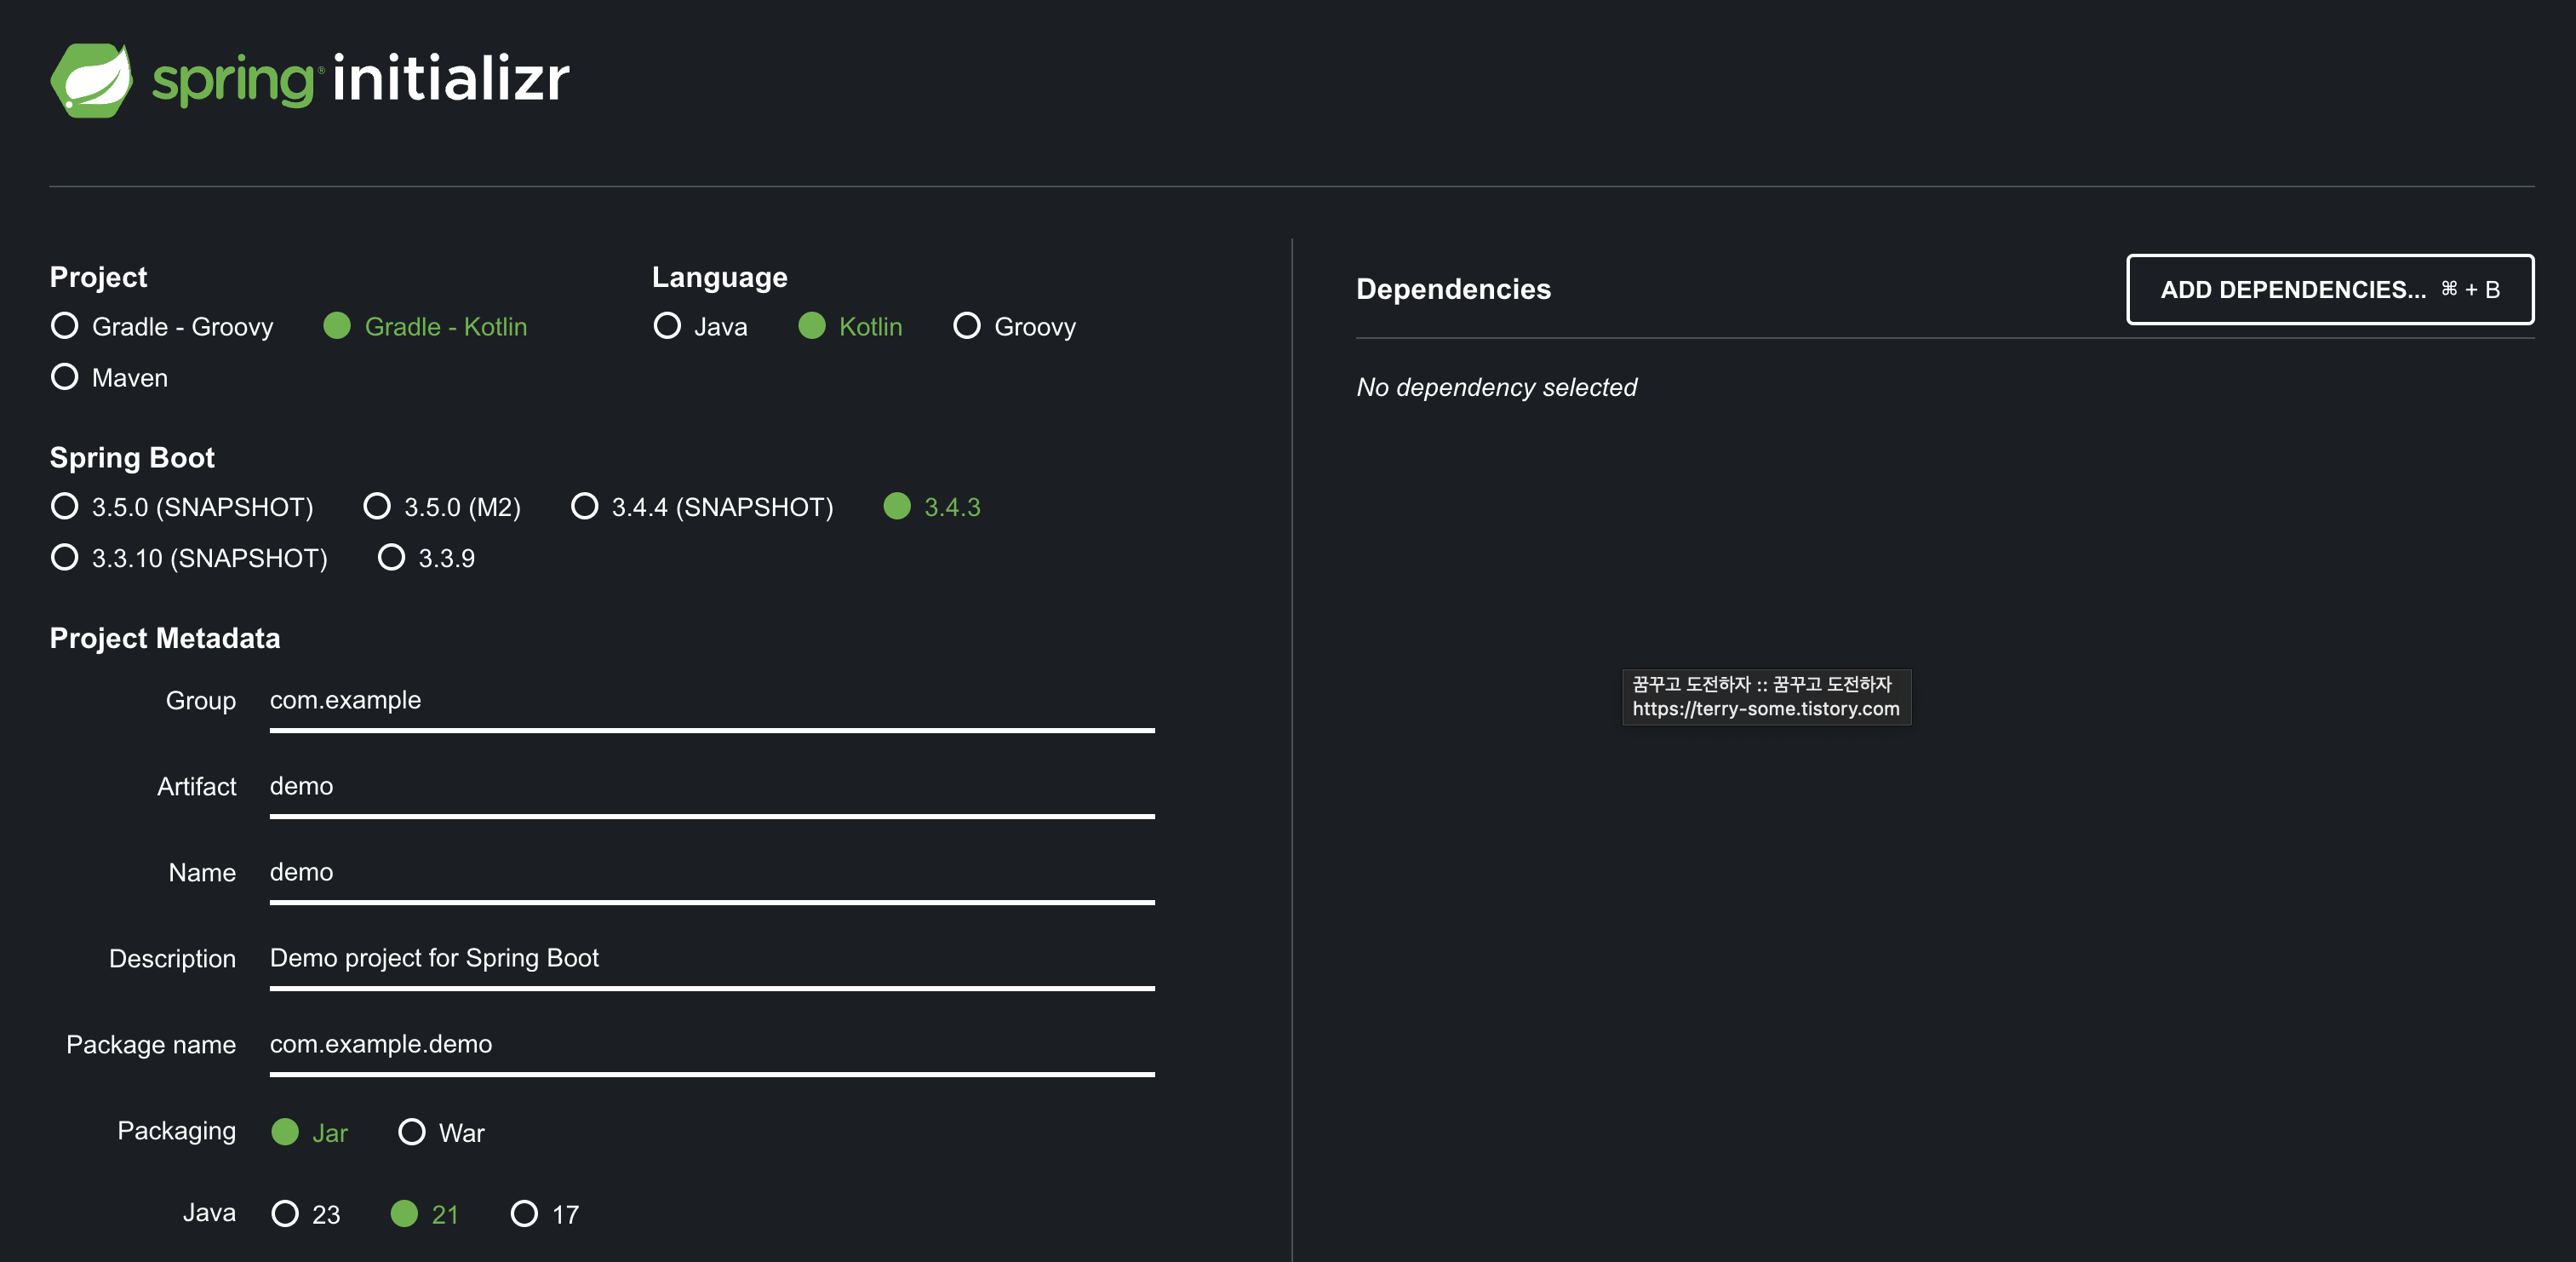
- Spring Boot(Kotlin) 프로젝트 생성
- Spring Initializr를 사용하여 Kotlin 기반의 Spring Boot 프로젝트 생성
- Gradle 또는 Maven 선택 (이 글에서는 Gradle 사용)
- 필요한 의존성 추가 (Spring Web, Spring Data JPA, MySQL Driver 등)
- MySQL 데이터베이스 설정
- MySQL 설치 및 실행
- 데이터베이스 및 사용자 생성
application.yml에서 MySQL 연결 정보 설정
- Xcode + SwiftUI 개발 환경 구성
- 최신 Xcode 설치 및 SwiftUI 프로젝트 생성
- REST API 호출을 위한 네트워크 설정
🏗️ 프로젝트 초기 설정
1️⃣ Spring Boot 프로젝트 생성
gradle initbuild.gradle.kts파일에서 필요한 의존성을 추가
dependencies {
    implementation("org.springframework.boot:spring-boot-starter-web")
    implementation("org.springframework.boot:spring-boot-starter-data-jpa")
    runtimeOnly("mysql:mysql-connector-java")
}
2️⃣ Spring Boot와 MySQL 연동 (application.yml)
spring:
  datasource:
    url: jdbc:mysql://localhost:3306/board_db
    username: root
    password: yourpassword
    driver-class-name: com.mysql.cj.jdbc.Driver
  jpa:
    hibernate:
      ddl-auto: update
    show-sql: true
3️⃣ CORS 설정 (iOS 클라이언트 API 요청 허용)
Spring Boot에서 CORS를 설정하여 iOS 앱의 API 요청을 허용해야 합니다.
import org.springframework.context.annotation.Bean
import org.springframework.context.annotation.Configuration
import org.springframework.web.servlet.config.annotation.CorsRegistry
import org.springframework.web.servlet.config.annotation.WebMvcConfigurer

@Configuration
class CorsConfig {
    @Bean
    fun corsConfigurer(): WebMvcConfigurer {
        return object : WebMvcConfigurer {
            override fun addCorsMappings(registry: CorsRegistry) {
                registry.addMapping("/**")
                    .allowedOrigins("http://localhost:3000", "http://your-ios-app.com")
                    .allowedMethods("GET", "POST", "PUT", "DELETE")
            }
        }
    }
}

// Lambda

import org.springframework.context.annotation.Bean
import org.springframework.context.annotation.Configuration
import org.springframework.web.servlet.config.annotation.CorsRegistry
import org.springframework.web.servlet.config.annotation.WebMvcConfigurer

@Configuration
class CorsConfig {
    @Bean
    fun corsConfigurer(): WebMvcConfigurer = WebMvcConfigurer { registry: CorsRegistry ->
        registry.addMapping("/**")
            .allowedOrigins("http://localhost:3000", "http://your-ios-app.com")
            .allowedMethods("GET", "POST", "PUT", "DELETE")
    }
}
📂 프로젝트 구조 설계
백엔드 API를 설계하기 위해 REST API 개념과 데이터 모델을 정의합니다.
1️⃣ REST API 설계 개념
게시판의 기본 기능을 API로 정의합니다.
| 기능 | HTTP 메서드 | 엔드포인트 |
|---|---|---|
| 게시글 조회 | GET |
/posts |
| 게시글 상세 | GET |
/posts/{id} |
| 게시글 작성 | POST |
/posts |
| 게시글 수정 | PUT |
/posts/{id} |
| 게시글 삭제 | DELETE |
/posts/{id} |
2️⃣ 엔티티(Entity) 및 DTO 설계
📌 게시글 엔티티
import jakarta.persistence.*

@Entity
@Table(name = "posts")
data class Post(
    @Id @GeneratedValue(strategy = GenerationType.IDENTITY)
    val id: Long? = null,
    val title: String,
    val content: String
)
📌 데이터 전송 객체 (DTO)
data class PostDto(
    val title: String,
    val content: String
)
🔗 iOS 클라이언트와 API 통신
iOS 앱에서 REST API를 호출하는 방법을 간단히 정리해보겠습니다.
Swift - API 요청 예제
import Foundation

struct Post: Codable {
    let id: Int
    let title: String
    let content: String
}

func fetchPosts() {
    guard let url = URL(string: "http://localhost:8080/posts") else { return }

    URLSession.shared.dataTask(with: url) { data, response, error in
        if let data = data {
            do {
                let posts = try JSONDecoder().decode([Post].self, from: data)
                print(posts)
            } catch {
                print("Decoding error:", error)
            }
        }
    }.resume()
}
📢 다음 단계 예고
다음 글에서는 REST API를 본격적으로 구축하고, iOS 앱과의 연동을 자세히 다룰 예정입니다.
🛠️ 예고:
- CRUD 기능을 포함한 API 구현
- iOS에서 POST 요청으로 데이터 저장하기
- JWT 기반 사용자 인증 시스템 구축
❓ FAQ
1️⃣ Kotlin을 사용하는 이유는?
Kotlin은 Java보다 간결하고 가독성이 뛰어나며, Spring Boot와의 호환성이 우수합니다. 그리고 Swift의 조상 언어로써 iOS 개발자가 쉽게 배울 수 있는 언어이기도 합니다.
2️⃣ MySQL 대신 다른 데이터베이스를 사용할 수 있나요?
네, PostgreSQL, MariaDB 등도 사용 가능합니다.
3️⃣ iOS에서 API 요청이 실패하는 경우는?
CORS 설정을 확인하고, 백엔드와 iOS 앱의 네트워크 설정을 점검하세요.
4️⃣ Spring Boot를 클라우드에 배포할 수 있나요?
네, AWS, Heroku, GCP 등에서 쉽게 배포할 수 있습니다.
5️⃣ SwiftUI에서 데이터 바인딩은 어떻게 하나요?
@State와 ObservableObject를 활용하여 API 응답을 UI에 바인딩할 수 있습니다.
마무리
Spring Boot와 MySQL을 활용하여 실제 iOS 앱과 연동하는 백엔드 시스템을 구축하는 과정은 흥미롭습니다.
앞으로 진행될 게시물에서는 API 설계부터 보안, 배포까지 실전 프로젝트와 함께 다뤄보겠습니다.
'서버' 카테고리의 다른 글
| [Spring Boot] 스프링부트 서버 개발 게시물 연재 예정 (0) | 2025.03.02 |
|---|